Motivation
"Artificial Intelligence (AI) is considered a major innovation that could disrupt many things. Some people even compare it to the Internet. A large investor firm predicted that some AI startups could become the next Apple, Google or Amazon within five years"- Prof. John Vu, Carnegie Mellon University.
Using chatbots to support our daily tasks is super useful and interesting. In fact, "Jenkins CI, Jira Cloud, and Bitbucket" have been becoming must-have apps in Slack of my team these days.
There are some existing approaches for chatbots including pattern matching, algorithms, and neutral networks. RiveScript is a scripting language using "pattern matching" as a simple and powerful approach for building up a Chabot.
Architecture
Actually, it was flexible to choose a programming language for the used Rivescript interpreter like Java, Go, Javascript, Python, and Perl. I went with Java.Used Technologies and Tools
- Oracle JDK 1.8.0_151
- Apache Maven 3.5.2
- Apache Tomcat 7.0.85
- RiveScript-Java
- Jersey sever/client
- MyFaces
Module ChatBot Backend
I had a backend for chatbot's brain which provided APIs responding to received messages from users via a GUI.1. Generate a web app project via Maven
mvn archetype:generate \
-DgroupId=vn.nvanhuong \
-DartifactId=chatbot_rivescript_backend \
-DarchetypeArtifactId=maven-archetype-webapp \
-DinteractiveMode=false;
Tips: When importing the project into Eclipse, I encountered an error "The superclass "javax.servlet.http.HttpServlet" was not found on the Java Build Path". I solved it by "Right click on the project/Properties/Project Facets/Runtimes/Check Apache Tomcat v.7.0"
2. Add dependencies needed in `pom.xml`
<project xmlns="http://maven.apache.org/POM/4.0.0" xmlns:xsi="http://www.w3.org/2001/XMLSchema-instance"
 xsi:schemaLocation="http://maven.apache.org/POM/4.0.0 http://maven.apache.org/maven-v4_0_0.xsd">
 <modelVersion>4.0.0</modelVersion>
 <groupId>vn.nvanhuong</groupId>
 <artifactId>chatbot_rivescript_backend</artifactId>
 <packaging>war</packaging>
 <version>1.0-SNAPSHOT</version>
 <name>chatbot_rivescript_backend Maven Webapp</name>
 <url>http://maven.apache.org</url>

 <dependencies>
  <!-- ChatBot Brain -->
  <dependency>
   <groupId>com.rivescript</groupId>
   <artifactId>rivescript-core</artifactId>
   <version>0.10.0</version>
  </dependency>

  <!-- RESTful APIs -->
  <dependency>
   <groupId>com.sun.jersey</groupId>
   <artifactId>jersey-server</artifactId>
   <version>1.8</version>
  </dependency>

  <!-- JSON -->
  <dependency>
   <groupId>org.json</groupId>
   <artifactId>json</artifactId>
   <version>20160810</version>
  </dependency>

  <!-- Unit tests -->
  <dependency>
   <groupId>junit</groupId>
   <artifactId>junit</artifactId>
   <version>4.12</version>
   <scope>test</scope>
  </dependency>
 </dependencies>

 <build>
  <finalName>chatbot_rivescript_backend</finalName>
 </build>
</project>
3. Create chatbot's brain with RiveScript
I created a file "chatbot_brain.rive" under the folder "src/main/resources/rivescript". I copied the content of template file "rs_standard.rive" at https://www.rivescript.com/try+ hello bot - Hello human!
4. Create RESTful APIs
package vn.nvanhuong.chatbot.rivescript.backend;

import javax.ws.rs.POST;
import javax.ws.rs.Path;

import com.rivescript.Config;
import com.rivescript.RiveScript;
import com.sun.jersey.spi.resource.Singleton;

@Path("/bot")
@Singleton
public class ChatBot {
 private RiveScript bot;

 public ChatBot() {
  String rivescriptFilePath = ChatBot.class.getClassLoader().getResource("rivescript").getFile();
  bot = new RiveScript(Config.utf8());

  bot.loadDirectory(rivescriptFilePath);
        bot.sortReplies();
 }

 @POST
 public String getMsg(String msg) {
  return bot.reply("user", msg);
 }

}
5. Configure RESTful at `web.xml`
<web-app id="WebApp_ID" version="2.4"
 xmlns="http://java.sun.com/xml/ns/j2ee"
 xmlns:xsi="http://www.w3.org/2001/XMLSchema-instance"
 xsi:schemaLocation="http://java.sun.com/xml/ns/j2ee
 http://java.sun.com/xml/ns/j2ee/web-app_2_4.xsd">
 <display-name>Restful Web Application</display-name>

 <servlet>
  <servlet-name>jersey-serlvet</servlet-name>
  <servlet-class>
                     com.sun.jersey.spi.container.servlet.ServletContainer
                </servlet-class>
  <init-param>
       <param-name>com.sun.jersey.config.property.packages</param-name>
       <param-value>vn.nvanhuong.chatbot.rivescript.backend</param-value>
  </init-param>
  <load-on-startup>1</load-on-startup>
 </servlet>

 <servlet-mapping>
  <servlet-name>jersey-serlvet</servlet-name>
  <url-pattern>/rest/*</url-pattern>
 </servlet-mapping>

</web-app>
6. Write a test case
package vn.nvanhuong.chatbot.rivescript.backend.test;

import static org.junit.Assert.assertEquals;

import org.junit.Test;

import vn.nvanhuong.chatbot.rivescript.backend.ChatBot;

public class ChatBotTest {

 @Test
 public void should_say_hello() {
  ChatBot bot = new ChatBot();

  assertEquals("Hello Human!", bot.getMsg("Hello Bot"));
 }
}
7. Test the API with Postman
URL: http://localhost:8080/chatbot_rivescript_backend/rest/botModule ChatBot GUI
1. Generate a web app project via Maven
mvn archetype:generate \
-DgroupId=vn.nvanhuong \
-DartifactId=chatbot_rivescript_gui \
-DarchetypeArtifactId=maven-archetype-webapp \
-DinteractiveMode=false
2. Add dependencies needed in pom.xml
<project xmlns="http://maven.apache.org/POM/4.0.0" xmlns:xsi="http://www.w3.org/2001/XMLSchema-instance"
 xsi:schemaLocation="http://maven.apache.org/POM/4.0.0 http://maven.apache.org/maven-v4_0_0.xsd">
 <modelVersion>4.0.0</modelVersion>
 <groupId>vn.nvanhuong</groupId>
 <artifactId>chatbot_rivescript_gui</artifactId>
 <packaging>war</packaging>
 <version>1.0-SNAPSHOT</version>
 <name>chatbot_rivescript_gui Maven Webapp</name>
 <url>http://maven.apache.org</url>

 <dependencies>
  <!-- JAX-RS Client -->
  <dependency>
   <groupId>org.glassfish.jersey.core</groupId>
   <artifactId>jersey-client</artifactId>
   <version>2.25.1</version>
  </dependency>

  <!-- JSF Pages -->
  <dependency>
   <groupId>org.apache.myfaces.core</groupId>
   <artifactId>myfaces-api</artifactId>
   <version>2.2.0</version>
  </dependency>
  <dependency>
   <groupId>org.apache.myfaces.core</groupId>
   <artifactId>myfaces-impl</artifactId>
   <version>2.2.0</version>
  </dependency>

  <!-- Unit test -->
  <dependency>
   <groupId>junit</groupId>
   <artifactId>junit</artifactId>
   <version>4.12</version>
   <scope>test</scope>
  </dependency>
 </dependencies>

 <build>
  <finalName>chatbot_rivescript_gui</finalName>
 </build>
</project>
3. Configure JSF at web.xml
<?xml version="1.0" encoding="UTF-8"?>
<web-app xmlns:xsi="http://www.w3.org/2001/XMLSchema-instance"
 xmlns="http://java.sun.com/xml/ns/javaee"
 xmlns:web="http://java.sun.com/xml/ns/javaee/web-app_2_5.xsd"
 xsi:schemaLocation="http://java.sun.com/xml/ns/javaee http://java.sun.com/xml/ns/javaee/web-app_2_5.xsd"
 version="2.5">

 <!-- JSF mapping -->
 <servlet>
  <servlet-name>Faces Servlet</servlet-name>
  <servlet-class>javax.faces.webapp.FacesServlet</servlet-class>
  <load-on-startup>1</load-on-startup>
 </servlet>
 <servlet-mapping>
  <servlet-name>Faces Servlet</servlet-name>
  <url-pattern>*.xhtml</url-pattern>
 </servlet-mapping>

  <!-- welcome page -->
  <welcome-file-list>
    <welcome-file>index.xhtml</welcome-file>
  </welcome-file-list>
</web-app>
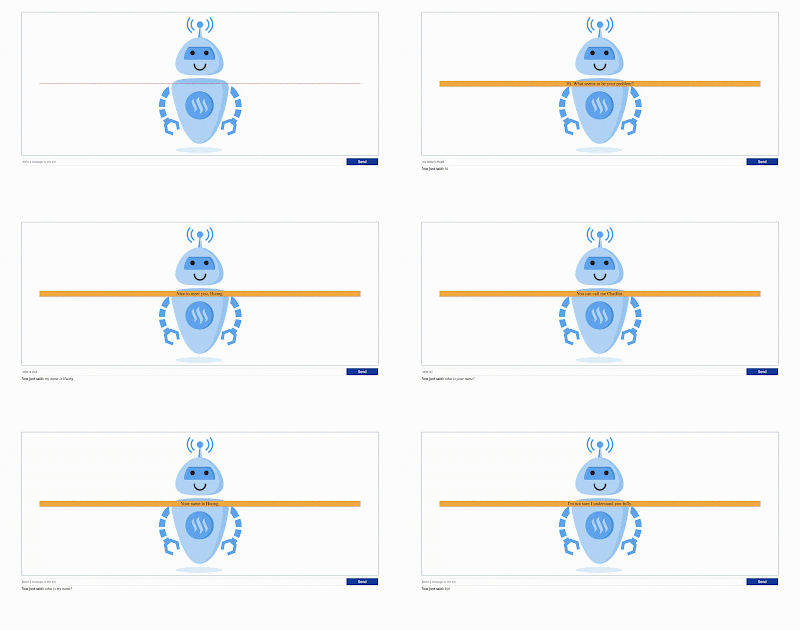
4. Create a GUI
Rename index.jsp to index.xthml
<!DOCTYPE html>
<html xmlns="http://www.w3.org/1999/xhtml"
 xmlns:f="http://java.sun.com/jsf/core"
 xmlns:h="http://java.sun.com/jsf/html"
 xmlns:p="http://xmlns.jcp.org/jsf/passthrough">
 <h:head>
  <title>RiveScript</title>
  <style>

   .container {
    display: block;
     margin: 50px auto;
     width: 90%;
   }

   .chatbox {
    height: 600px;
     border: solid 1px #039;
     background-image: url(bot_logo.png);
     background-repeat: no-repeat;
     background-position: center;
     background-size: contain;
     display: flex;
     justify-content: center;
     align-items: center;
   }

   .chatbox .bot-dialog {
    width: 90%;
     border: dashed 1px purple;
     text-align: center;
     background-color: orange;
   }

   .chatbox .bot-dialog > span{
    font-size: larger;
   }

   .message {
    display: flex;
    justify-content: space-between;

   }
   .message > input.message-input {
    width: 90%;
    margin-top: 10px;
    line-height: 2.3;
   }

   .message > input.submit {
    width: 9%;
     background-color: #039;
     color: white;
     font-size: 15px;
     margin-top: 10px;
   }

   .message-display > span {
     font-style: italic;
 }
 .message-display > label {
     font-weight: bold;
 }
 .message-display {
     margin-top: 5px;
 }

  </style>
 </h:head>
 <h:body>
 <h:form>
    <h:panelGroup layout="block" styleClass="container">
      <h:panelGroup layout="block" styleClass="chatbox">
       <h:panelGroup layout="block" styleClass="bot-dialog">
        <h:outputText id="botMessage" value="#{controller.botMessage}" escape="false"/>
       </h:panelGroup>
      </h:panelGroup>

      <h:panelGroup layout="block" styleClass="message">
       <h:inputText id="input" value="#{controller.humanMessage}" styleClass="message-input"
        p:placeholder="Send a message to the bot"
        p:autofocus="true"
        onblur="this.focus()"/>
       <h:commandButton id="button" value="Send" actionListener="#{controller.onSend}" styleClass="submit"/>
      </h:panelGroup>

      <h:panelGroup layout="block" styleClass="message-display" rendered="#{not empty controller.humanMessageDisplay}">
       <h:outputLabel for="messageDisplay" value="You just said: "/>
       <h:outputText id="messageDisplay" value="#{controller.humanMessageDisplay}"/>
      </h:panelGroup>
    </h:panelGroup>
 </h:form>
 </h:body>
</html>
5. Create a Controller to call the RESTful APIs
package vn.vanhuong.chatbot.rivescript.gui;

import javax.faces.bean.ManagedBean;
import javax.faces.event.ActionEvent;
import javax.ws.rs.client.ClientBuilder;
import javax.ws.rs.client.Entity;
import javax.ws.rs.core.MediaType;
import javax.ws.rs.core.Response;

@ManagedBean(name = "controller")
public class Controller {

 private String humanMessage;
 private String botMessage;
 private String humanMessageDisplay;

 public void onSend(ActionEvent event) {
  Response response = ClientBuilder.newClient().target("http://localhost:8080/chatbot_rivescript_backend/rest/bot")
    .request(MediaType.APPLICATION_FORM_URLENCODED)
    .post(Entity.entity(humanMessage, MediaType.APPLICATION_FORM_URLENCODED));
  this.botMessage = response.readEntity(String.class);
  this.humanMessageDisplay = humanMessage;
  this.humanMessage = null;
 }

 public String getHumanMessage() {
  return humanMessage;
 }

 public void setHumanMessage(String humanMessage) {
  this.humanMessage = humanMessage;
 }

 public String getBotMessage() {
  return botMessage;
 }

 public void setBotMessage(String botMessage) {
  this.botMessage = botMessage;
 }

 public String getHumanMessageDisplay() {
  return humanMessageDisplay;
 }

 public void setHumanMessageDisplay(String humanMessageDisplay) {
  this.humanMessageDisplay = humanMessageDisplay;
 }
}
6. Enjoy playing with your ChatBot
Check out my source code as below
- Backend: https://github.com/vnnvanhuong/chatbot_rivescript_backend.git- GUI: https://github.com/vnnvanhuong/chatbot_rivescript_gui.git
References:
[1]. http://science-technology.vn/?p=5761
[2]. https://www.rivescript.com/interpreters
[3]. https://github.com/aichaos/rivescript-java
[4]. https://youtu.be/wf8w1BJb9Xc


Comments
Post a Comment